Changing the IP address on your Ubuntu system may be important for a variety of reasons, including port forwarding and running a media server on your network. In the majority of circumstances, your router’s DHCP server allocates IP addresses to your network interface dynamically.
However, you may simply alter your system’s given IP address with “netplan” or the Ubuntu GUI Network settings. The utility used to manage and configure network settings in Ubuntu is called “netplan”.
The netplan communicates with the kernel via the systemd-networkd and Network Manager daemons, together referred to as renderers. You must choose between the two.
Netplan reads network configurations from “/etc/netplan/*.yaml” files, preserving all network interface configuration settings. If you use the netplan command in the Ubuntu terminal, restarting and changing network settings becomes simple.
Now, we’ll demonstrate how to change IP address on Ubuntu using the terminal and the graphical user interface. Therefore, let us begin!
How to use netplan to modify the IP address on an Ubuntu terminal
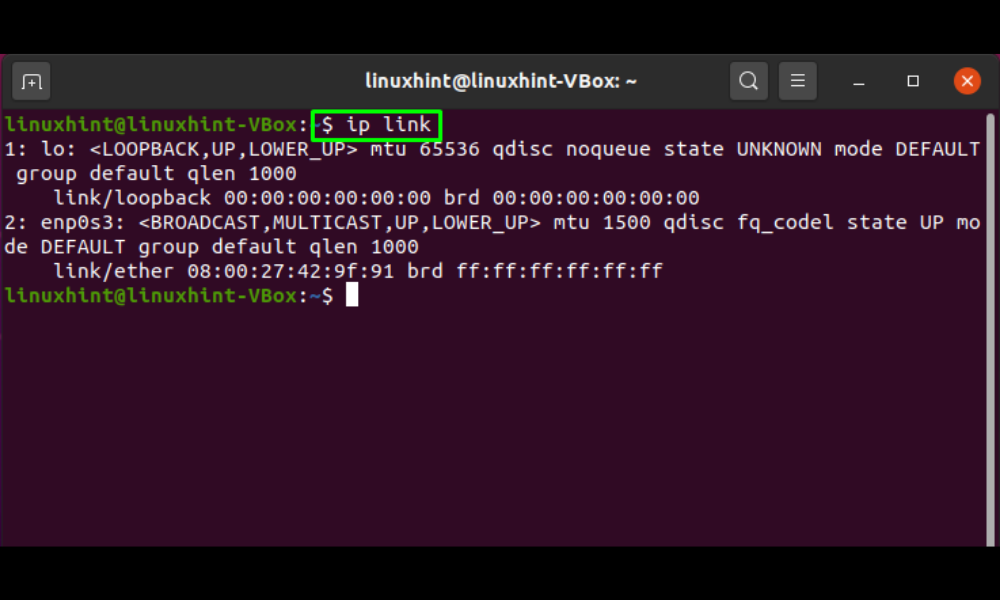
To begin, use the “ip” command to list all active network interfaces. The “ip” command is used in the Ubuntu terminal to assign and remove routes, as well as to enable and disable interfaces. By including “link” in the “ip” command, you may view information about the link-layer, the name, and status of an interface, among other things. To learn more about your network interfaces, run the following “ip link” command:
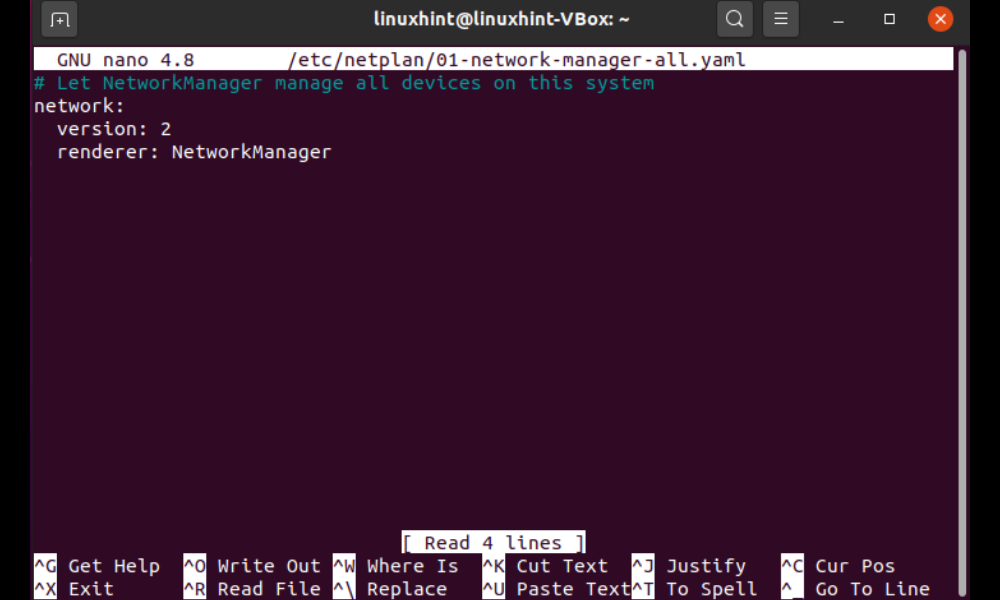
The following steps will open the file “/etc/netplan/*.yaml” in your editor:
The “/etc/netplan/*.yaml” file that is opened will include the following information:
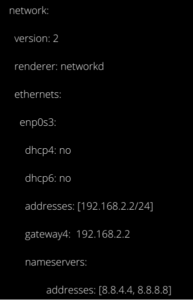
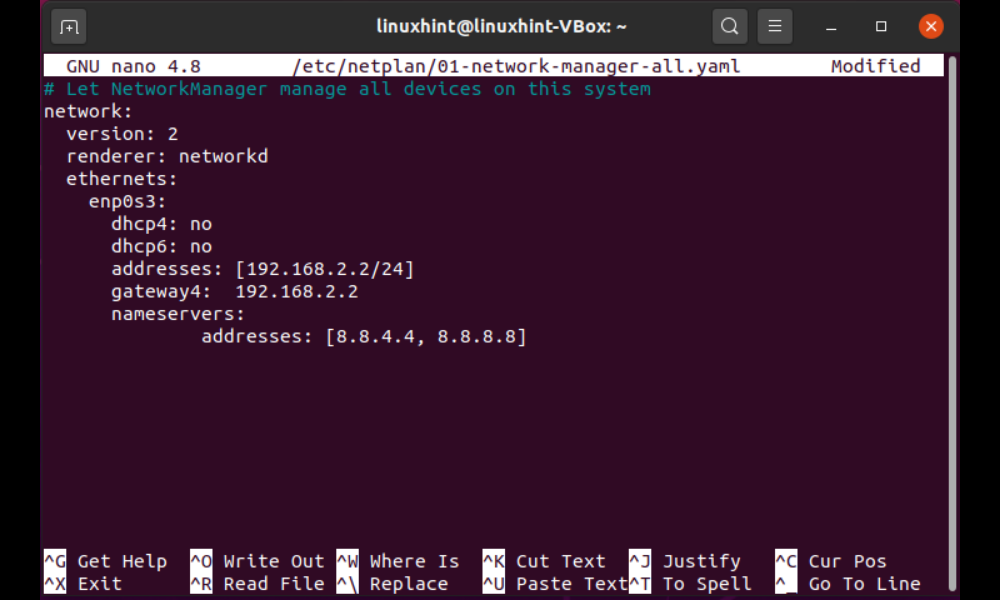
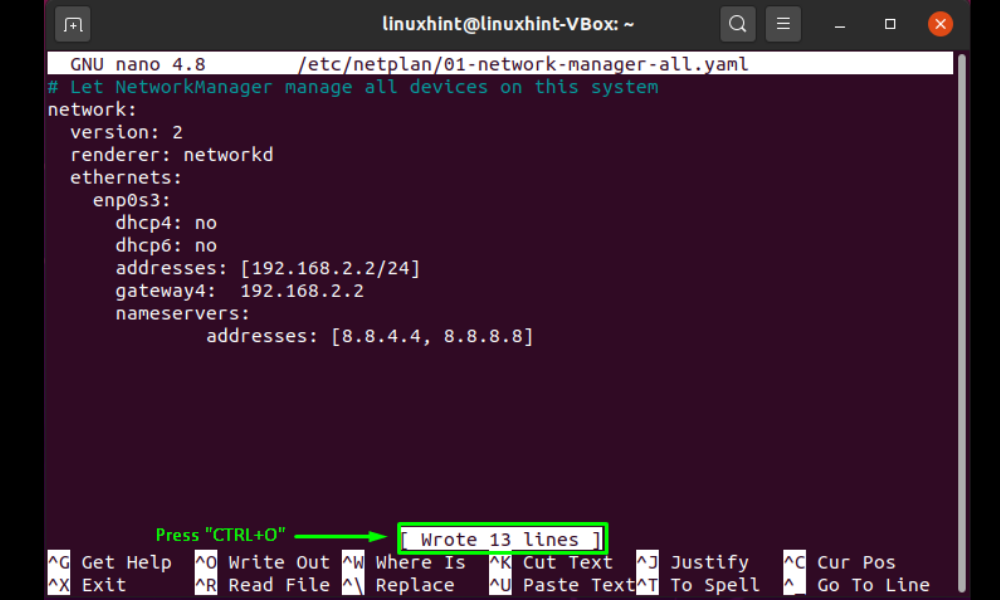
Now, in the “/etc/netplan/*.yaml” file, add the following code to modify your system’s IP address:
- dhcp4 and dhcp6 are DHCP characteristics for IPv4 and IPv6 respectively.
- enp0s3 is the network interface name for which the IP address will be changed.
- addresses contain the network interface’s address sequence.
- gateway4 holds the IPv4 address of the default gateway.
- nameservers are a collection of IP addresses assigned to nameservers.
To save the modifications we made to the file, use “CTRL+O”:
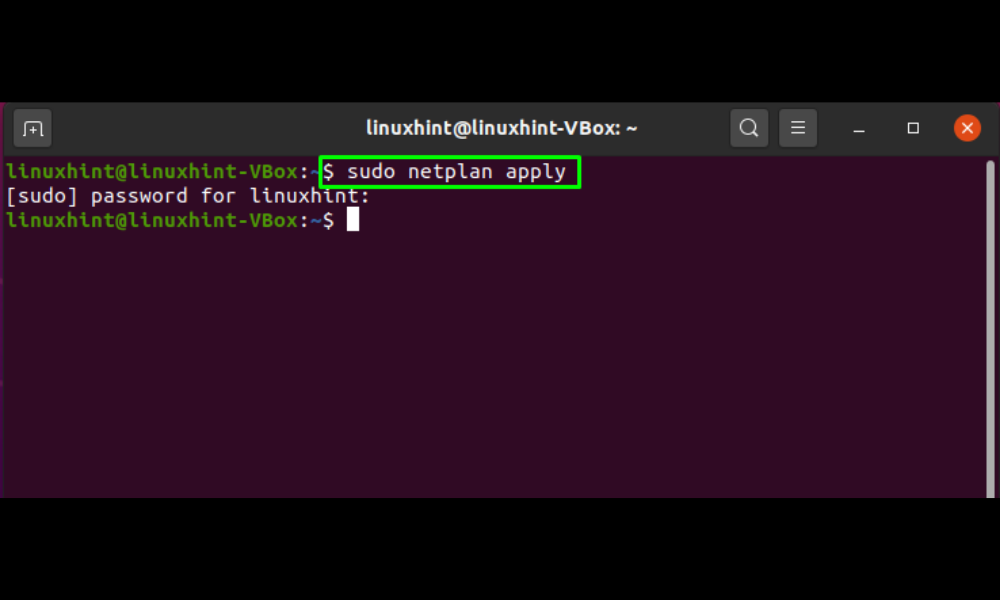
Utilize the following netplan command in your terminal to apply the amended settings:
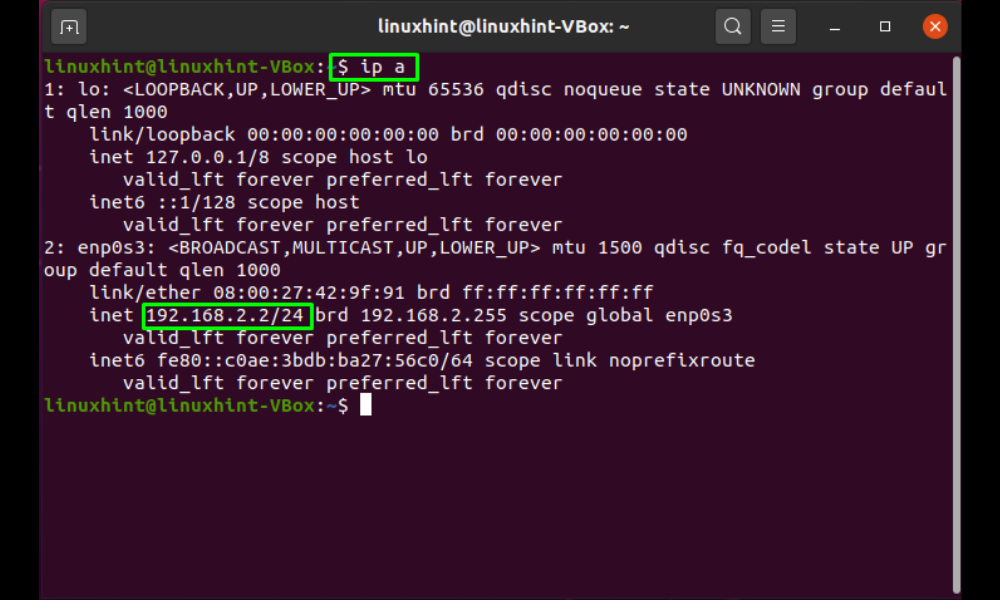
Now, verify whether or not the IP address of the “enpos3” network interface has been changed: As you can see, the Ubuntu system’s IP address has been successfully changed:
How to change the IP address on Ubuntu through the Graphical User Interface (GUI)
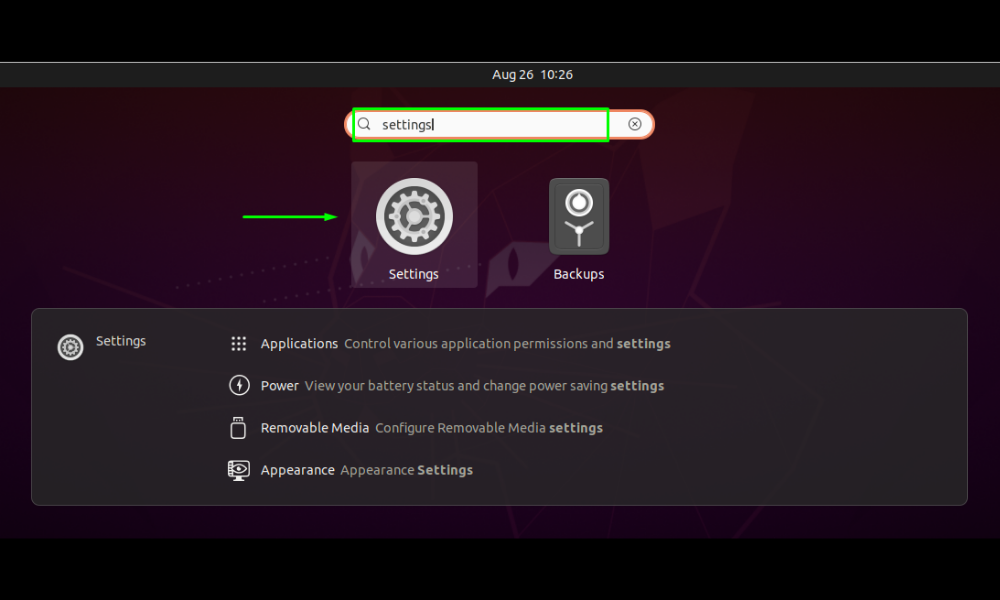
Yes, you read that correctly! Additionally, Ubuntu’s Graphical User Adapter allows you to alter the IP address of your network interface (GUI). To do so, access the “Settings” programme on your machine by manually searching for it in the Application’s search bar:
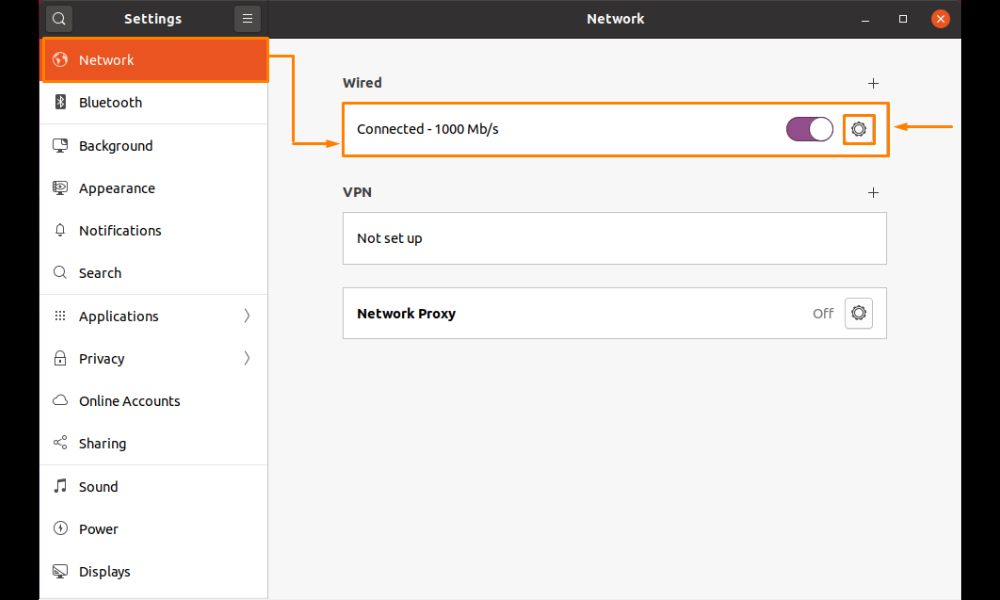
Select “Network” from the left-side vertical menu. Following that, click the “tool” icon to modify the selected network’s IP address:
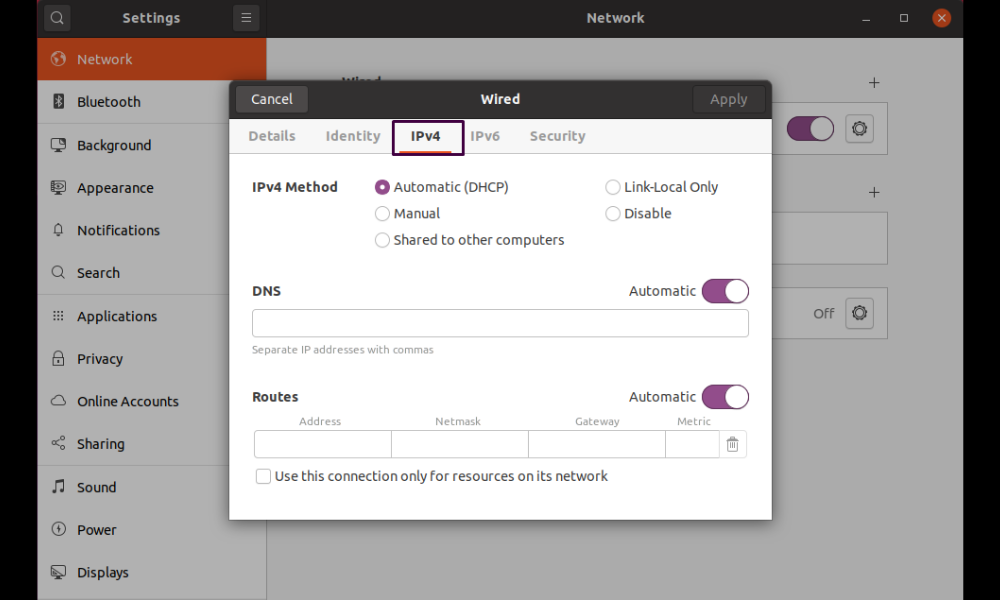
A popup displaying settings for your wired network connection will appear. Now, pick the “IPv4” tab from the menu, and you’ll notice that your system is configured to use the “Automatic (DHCP)” IPv4 method by default:
Select the “Manual” option; then, in the provided boxes, enter the new IP address, Netmask, Gateway, and DNS-related information. Finally, click the “Apply” button as follows:
Completed! You may verify that the information is up to date by selecting the “details” tab in your network interface:
Frequently Asked Questions
How do I assign an IP address using the command line in Ubuntu?
How can I configure a static IP address in Ubuntu's netplan?
Conclusion
You can change your IP address on Ubuntu for port forwarding or for running a media server. The Ubuntu system’s network management tool is called “netplan”. It has the ability to set up and manage networks.
The “netplan” programme was used in this article to explain how to modify the IP address on Ubuntu. The Ubuntu GUI is used to change the IP address, as well, according to the guide.
